In this article we’ll guide you step-by-step on how to submit Safety and Security Declarations (ENS) on Customs Declarations UK Platform. This guide covers everything from submitting a successful declaration to handling errors and cloning declarations for efficiency. Whether you’re new to customs declarations or looking to refine your process, this guide has you covered.
1. Setting Up Your Account
Before you can submit an ENS declaration, you need to ensure your account is set up correctly. Here’s how:
- Step 1: Obtain a GB EORI Number
If you don’t already have one, you’ll need a GB EORI number. This is essential for submitting customs declarations in the UK. - Step 2: Subscribe to Safety and Security Declarations on GOV.UK
Ensure you’re subscribed to the Safety and Security Declarations service on GOV.UK. - Step 3: Register on the Customs Declarations UK Platform
Create an account on the Customs Declarations UK platform if you haven’t already. - Step 4: Authorize Your Software
Authorize your software with HMRC to enable submission of declarations.
Once these steps are complete, you’re ready to start submitting ENS declarations!
2. Submitting a Successful ENS Declaration
Step-by-Step Process
- Log in to the Customs Declarations UK Platform
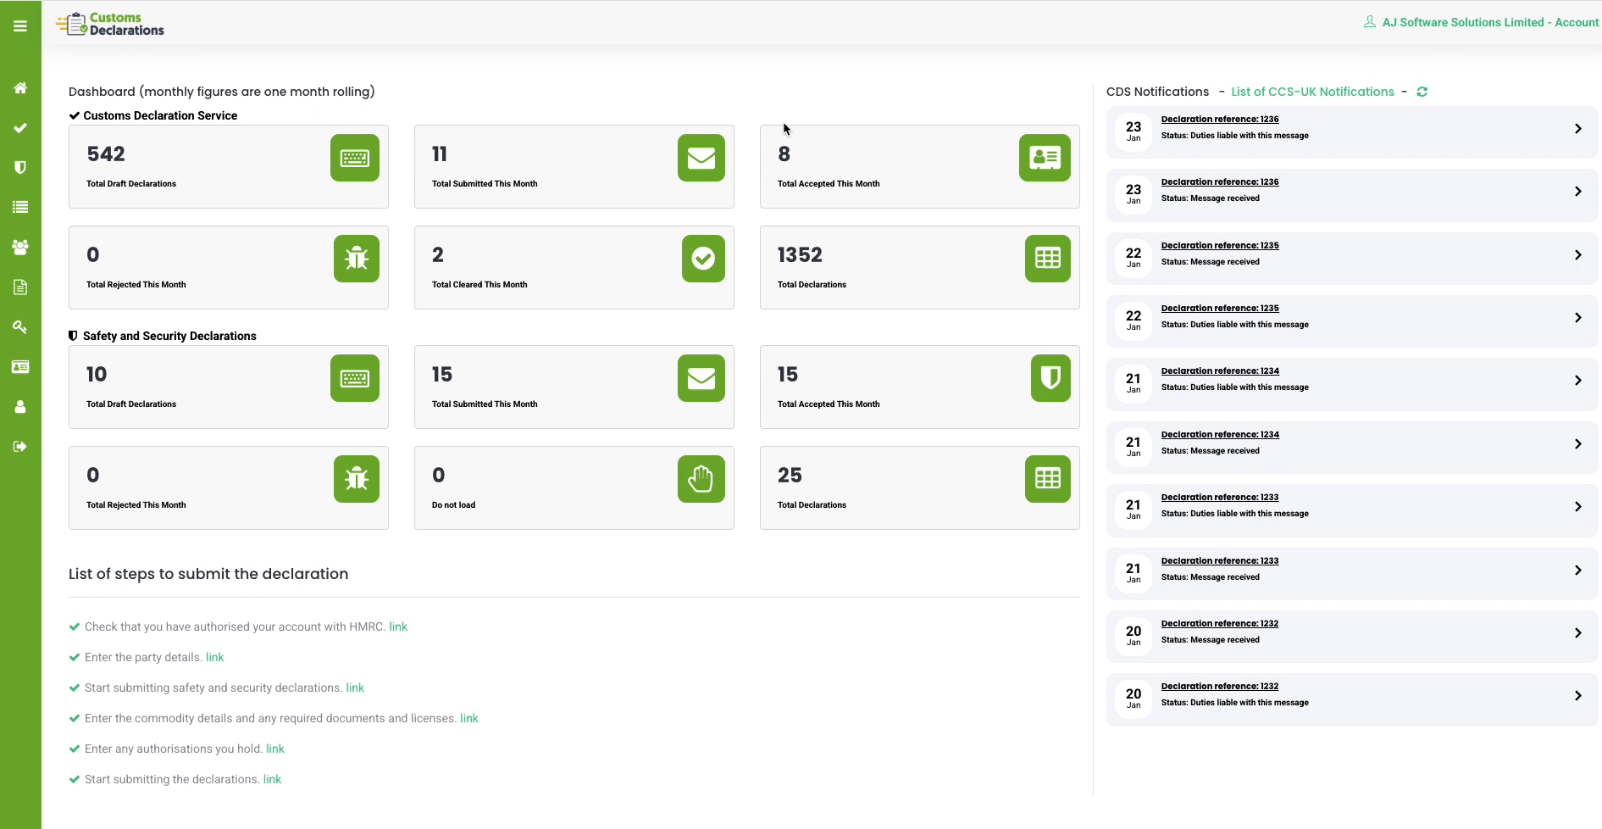
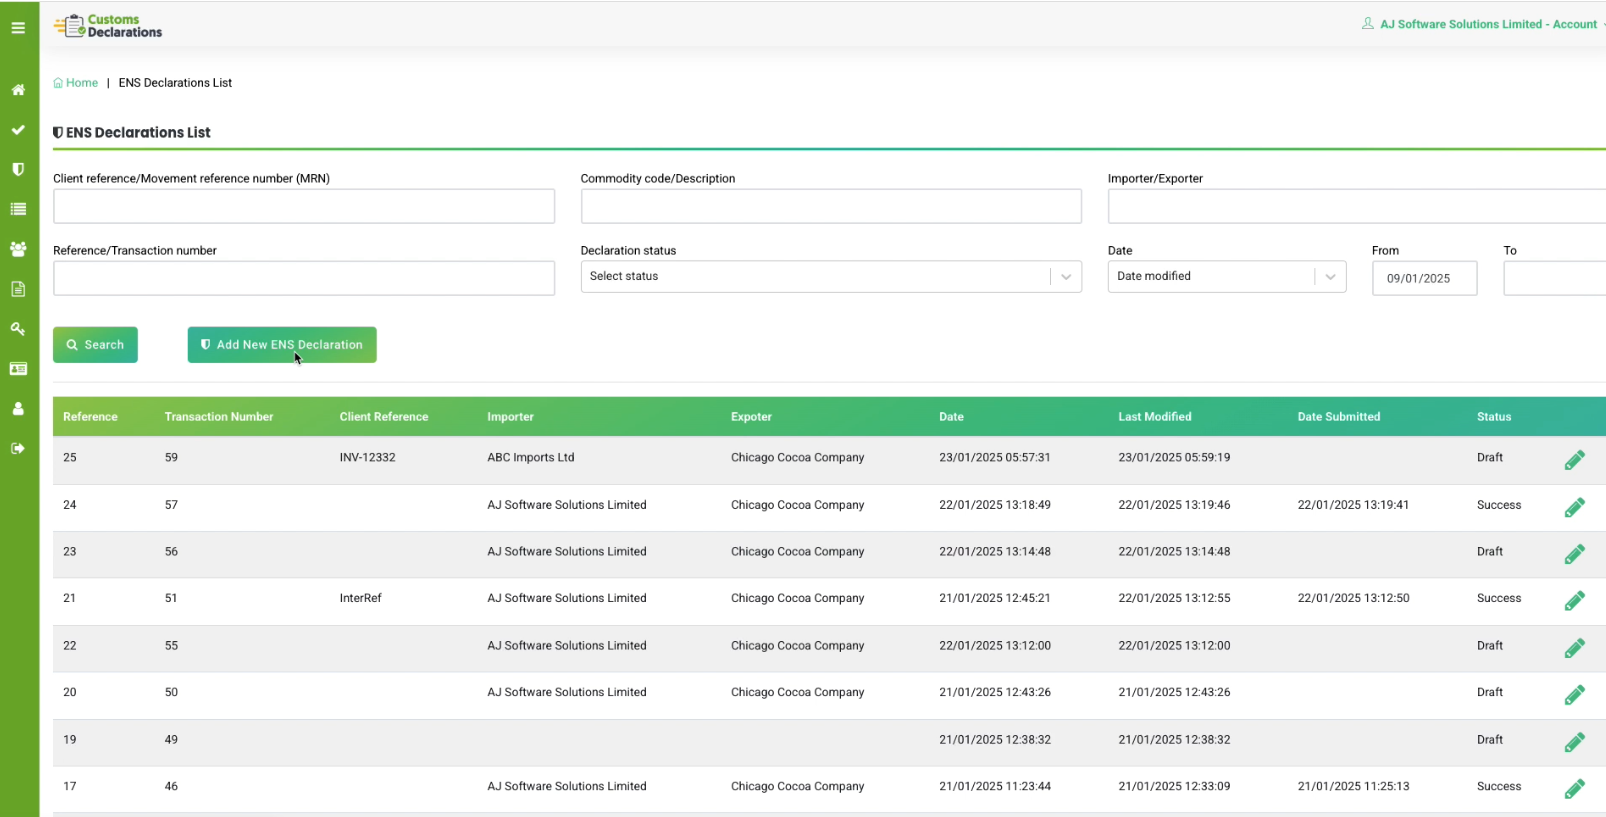
Once logged in, you’ll see the dashboard displaying your recent declarations. - Navigate to the ENS Declaration Section
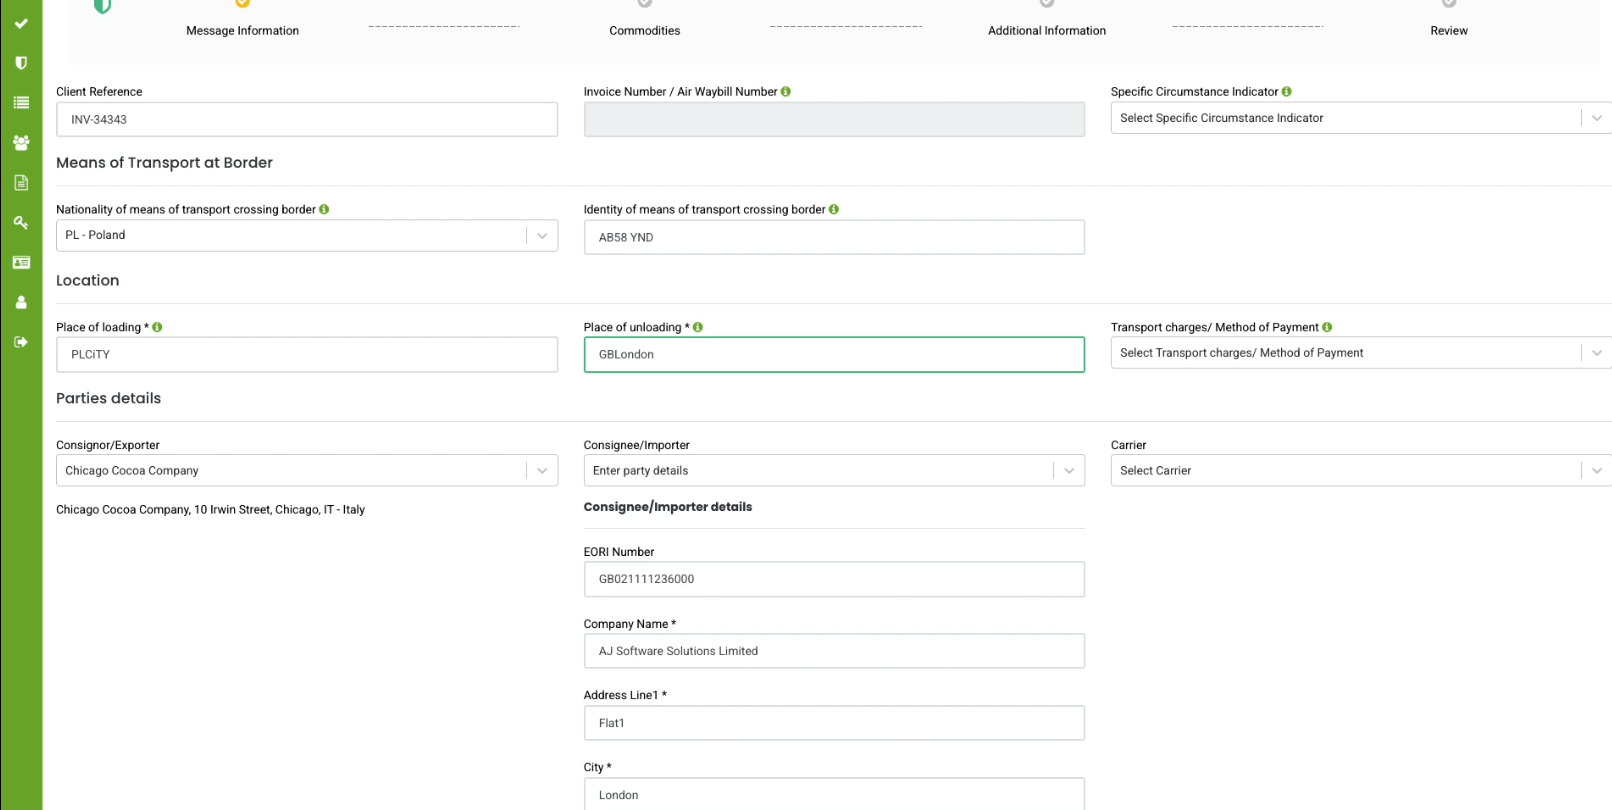
Click on the “Add New Declaration ⛊” button to start a blank ENS declaration. - Enter Client Reference (Optional)
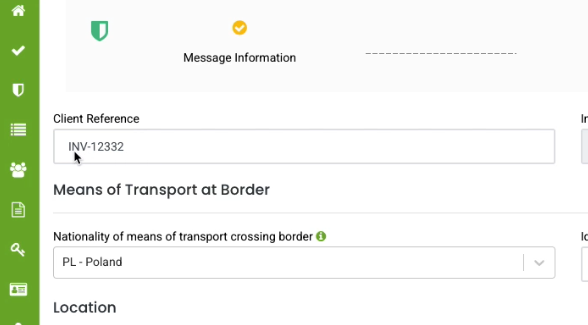
This is an internal reference and does not go to HMRC. You can enter it at the header or item level, depending on your needs. - Fill in Mandatory FieldsInvoice Number:
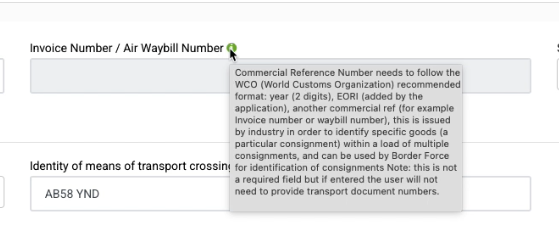
Enter the invoice number in the required format (e.g., two-digit year + EORI number).
Country and City Codes: Enter the relevant codes for the country and city of origin.
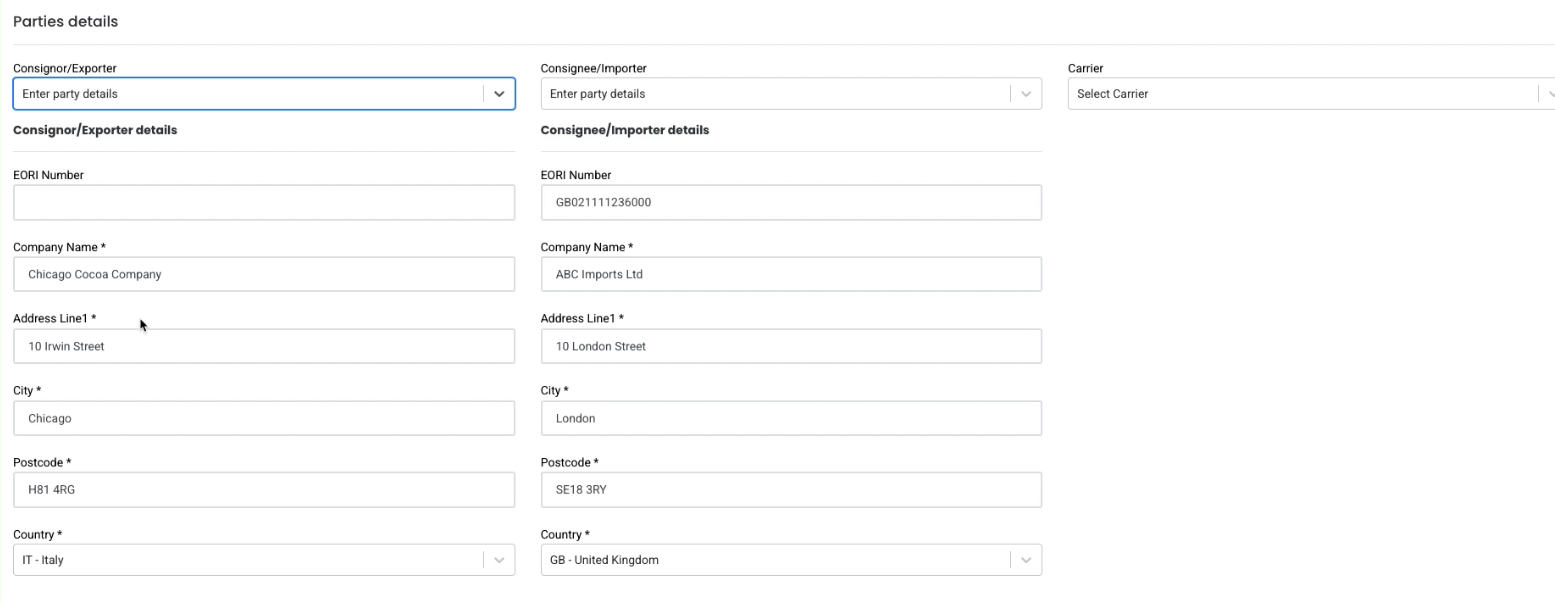
Arrival Country and Location: Provide details for the destination country and location. - Add Party Details
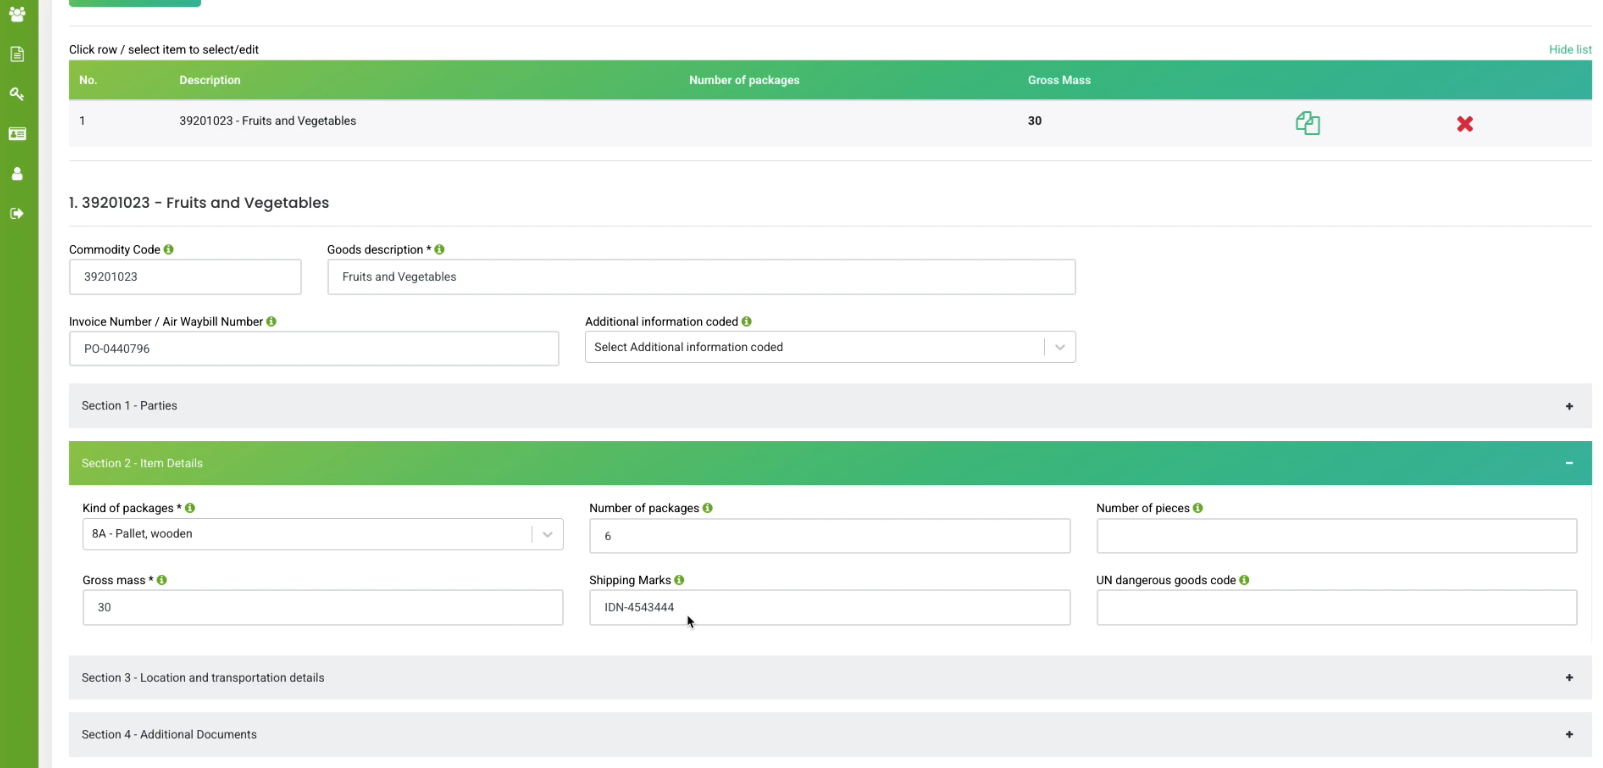
Exporter, Importer, and Carrier Details: You can either select from a saved list or manually enter the details - Enter Item Details
Commodity Code: While optional, it’s recommended to enter an 8-digit commodity code for clarity.
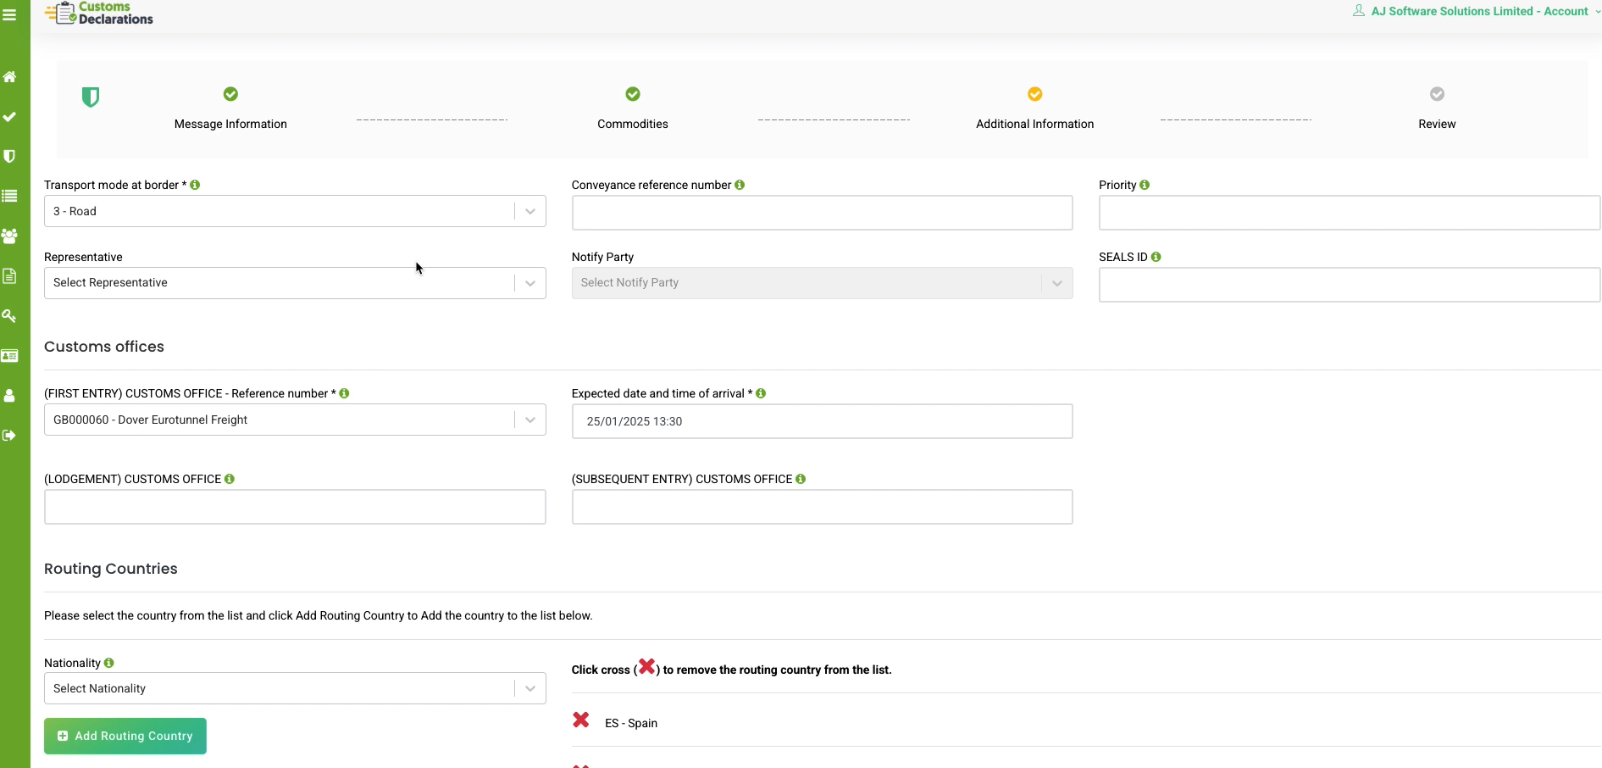
Packaging Type and Number of Packages: Provide details based on the type of goods being shipped. - Additional Information
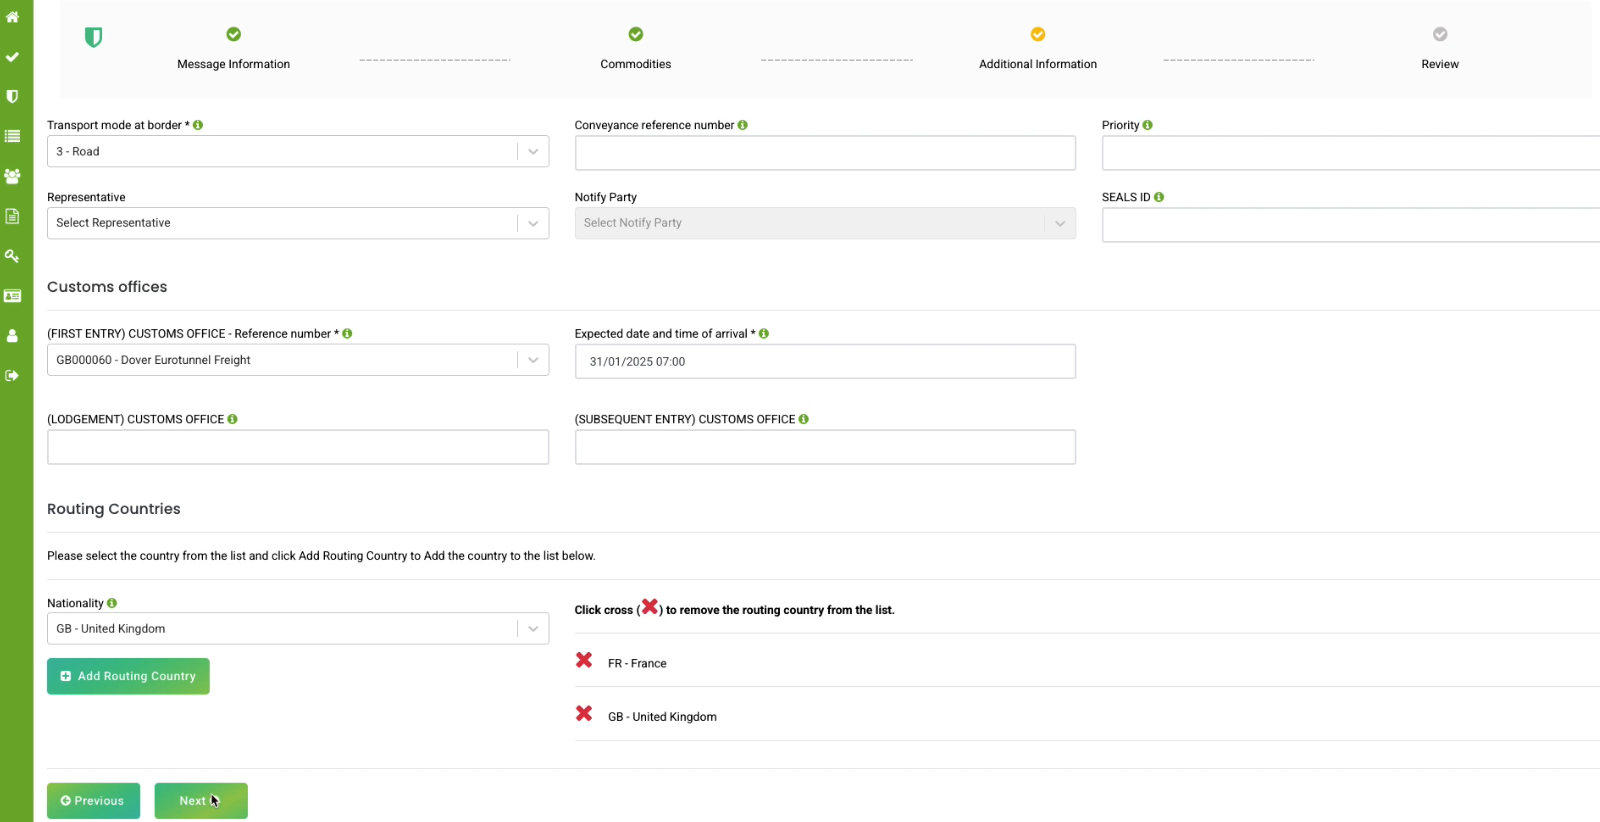
Transport Mode at Border: Select the appropriate transport mode (e.g., 10 – Road – accompanied)
Customs Office of First Entry: Enter the reference number for the customs office (e.g., GB000060 – Dover Eastern Docks Freight)
Routing Country: Add any routing countries if applicable (e.g., France)
Notify Party: Select or enter the details of the party to be notified upon arrival. - Review and Submit
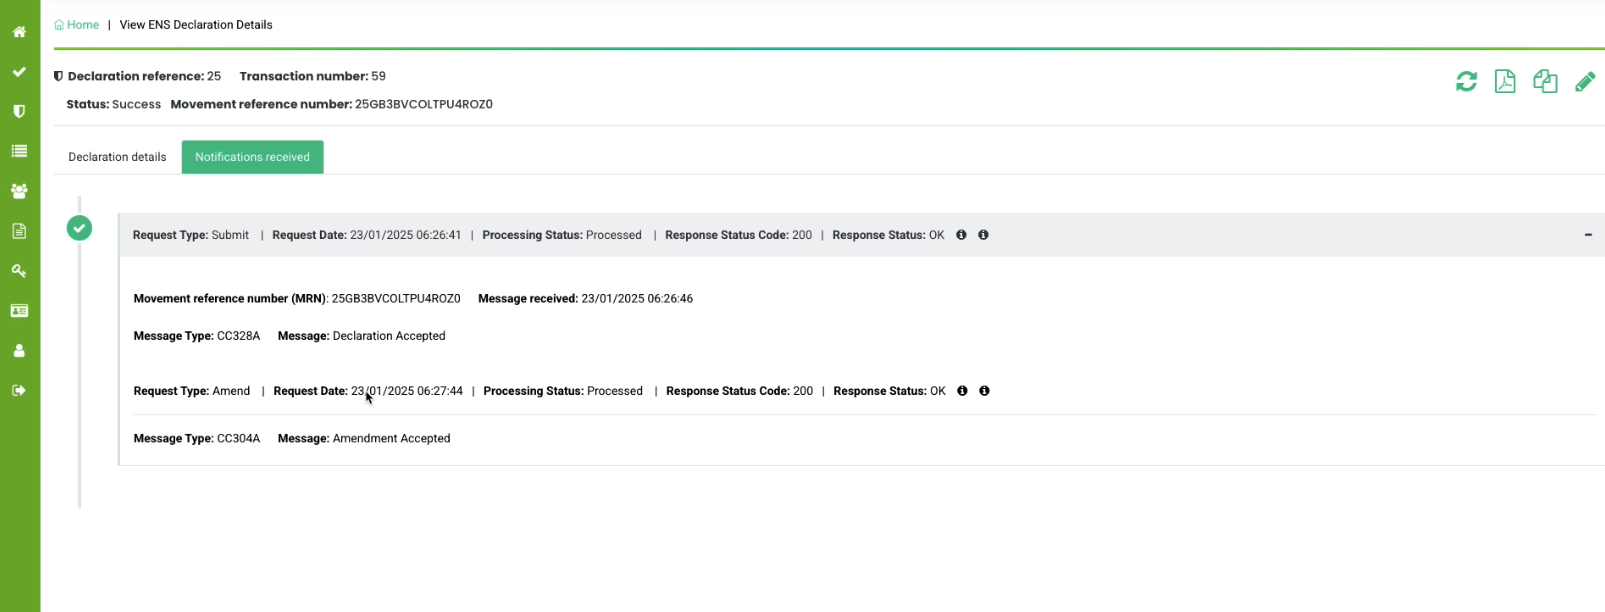
Once all details are entered, review the declaration and click “Submit.” You’ll receive an MRN (Movement Reference Number) from HMRC confirming the submission.

3. Making Amendments to a Declaration
How to Amend a Submitted Declaration
- Locate the Declaration
Find the declaration you wish to amend in the list of ENS declarations. - Click the Edit Icon (✎)
This allows you to make changes to the declaration. - Make Necessary Changes
For example, you can update the expected date of arrival, change the number of packages, or modify other relevant details. - Resubmit the Declaration
After making changes, click “Submit” again. You’ll receive a new MRN confirming the amended declaration.
4. Handling Rejections and Errors
Common Rejection Scenarios
- Incorrect Mode of Transport
If you select an illogical mode of transport (e.g., road transport for a shipment that should be by sea), the declaration will be rejected. - Missing Mandatory Fields
Ensure all mandatory fields are filled in correctly. If any are missing, the declaration will be rejected.
How to Correct Errors
- Review the Rejection Reason
The platform will provide a clear reason for the rejection. - Click the Edit Icon (Pencil)
Make the necessary corrections based on the rejection reason. - Resubmit the Declaration
Once corrections are made, resubmit the declaration.
5. Cloning Declarations for Efficiency
Cloning from an Existing ENS Declaration
- Locate the Declaration
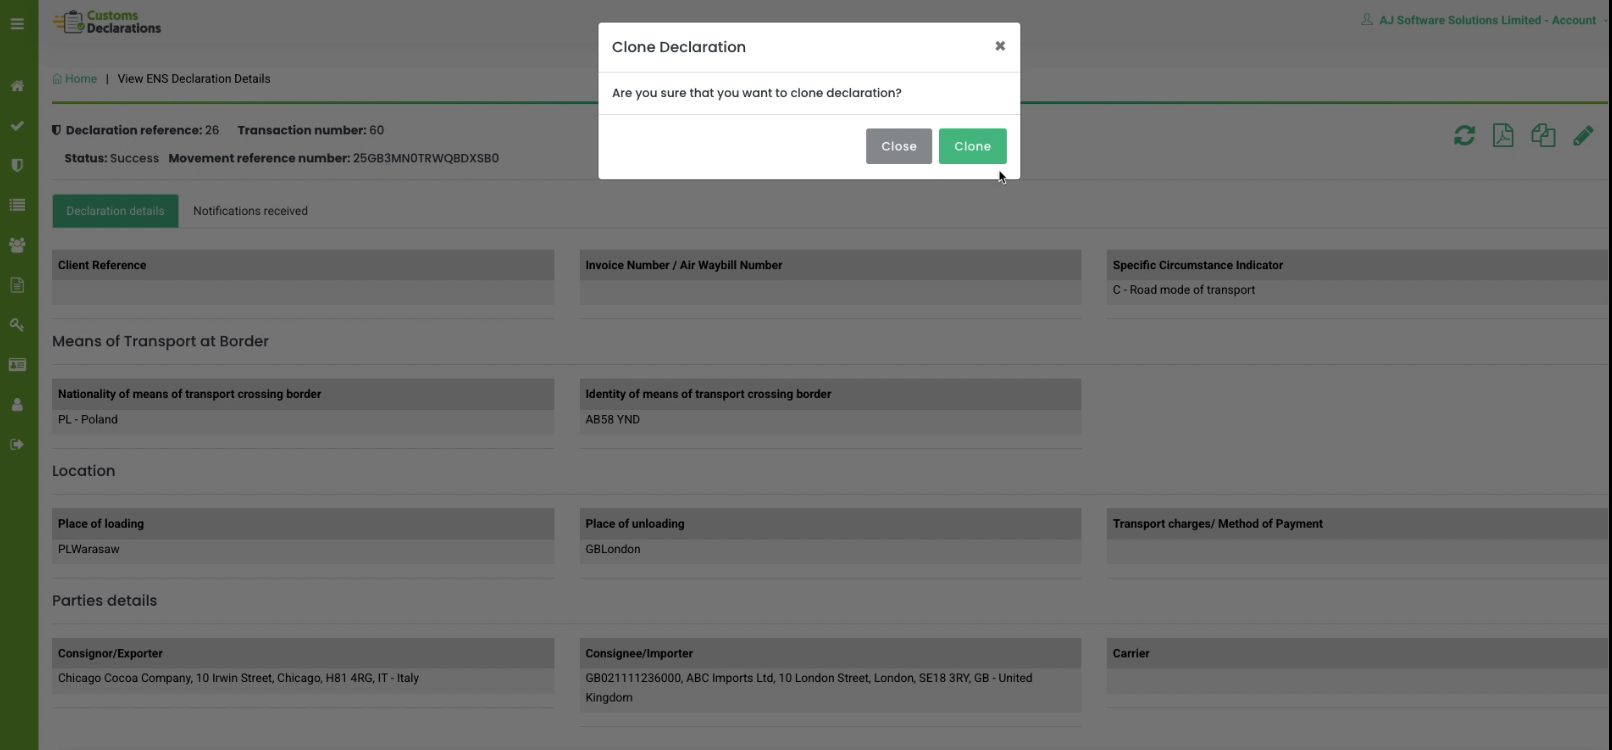
Find the declaration you wish to clone in the list of ENS declarations. - Click the Clone Button
This creates a new draft declaration with all the details copied from the original. - Make Necessary Changes
Update any specific details that differ from the original declaration. - Submit the Cloned Declaration
Once changes are made, submit the new declaration.
Cloning from a CDS Declaration to an ENS Declaration
- Locate the CDS Declaration
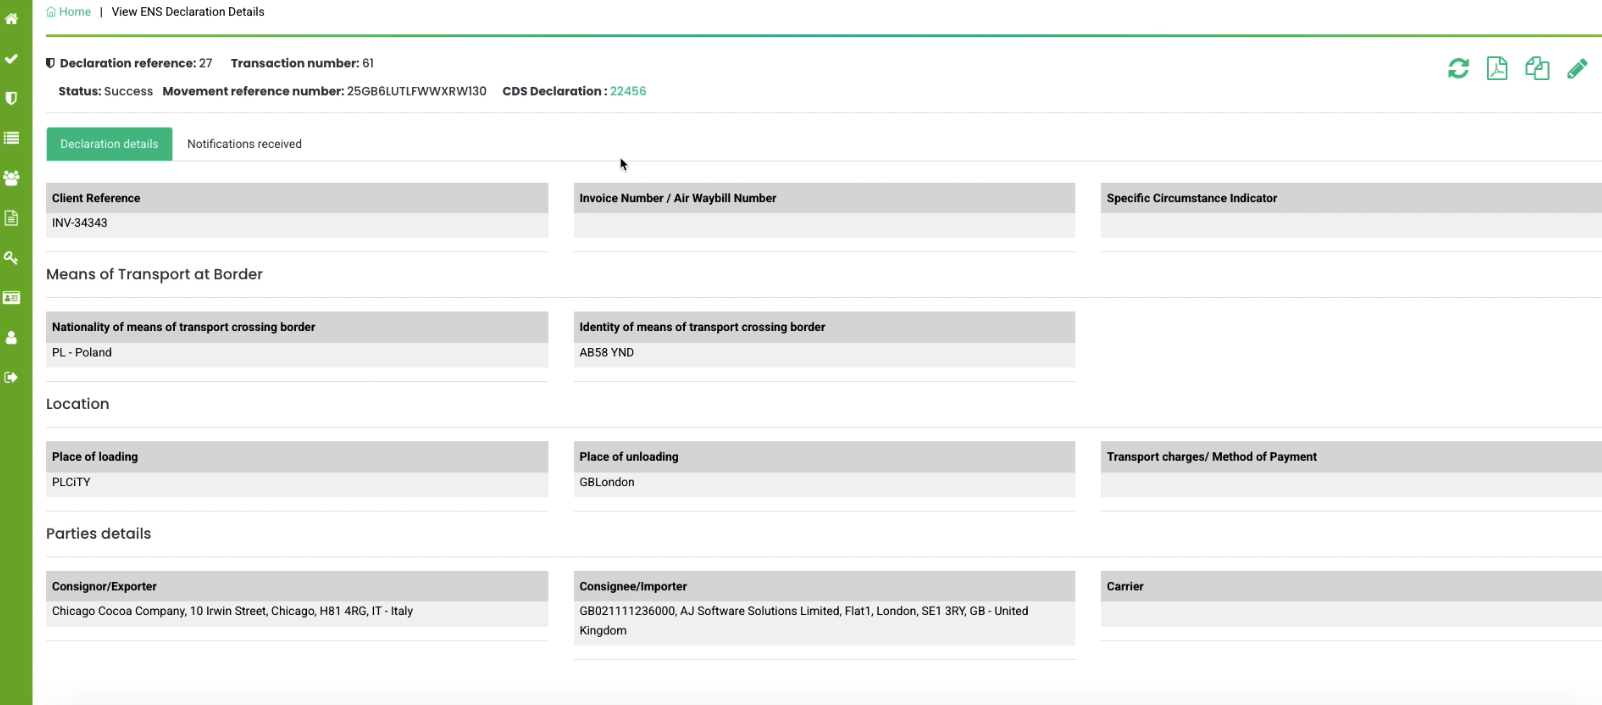
Find the CDS declaration you wish to clone in the list of ENS declarations. - Click the Clone to ENS Button
This copies most of the details from the CDS declaration to a new ENS declaration. - Enter Additional Details
Provide any additional information required for the ENS declaration, such as the place of loading and unloading. - Submit the ENS Declaration
Once all details are entered, submit the declaration.
6. Downloading a PDF Copy of the Declaration
Why Download a PDF?
Hauliers and drivers often require a physical copy of the declaration for their records.
How to Download
- Locate the Declaration
Find the declaration you wish to download in the list of ENS declarations. - Click the Download Button
This generates a PDF copy of the declaration, which you can save or print.

7. Real-Time Dashboard and Notifications
The platform’s dashboard provides real-time insights into your declarations:
- Status Updates: Monitor the status of submissions, amendments, and rejections.
- Notifications: Stay informed about pending actions or issues requiring your attention.
Why Choose Customs Declarations UK?
The Customs Declarations UK platform simplifies the complex world of customs compliance by offering:
- User-Friendly Interface: Intuitive navigation for all user levels.
- Automation Features: Save time with cloning and pre-filled forms.
- Real-Time HMRC Integration: Immediate feedback and status updates.
- Comprehensive Support: Access to tutorials, blogs, and customer support.
Conclusion
Submitting ENS declarations on the Customs Declarations UK platform is a straightforward process once you’re familiar with the steps. By following this guide, you can ensure smooth submissions, handle errors effectively, and save time by cloning declarations.

